Thursday, August 11, 2011

8/11/11 Gantrification of the South Bronx


It's done!

After far too many weeks, my gantry is done!

It took drilling, drilling, and more drilling to get it built. Actually, the most difficult part was keeping my drill bits sharp. As it turns out, drill bits aren't too fond of drilling through steel over and over, and tend to overheat and lose their edge.

In order to give it a bit of stiffness I put in two braces.


Once I had both in, I stood it upright. Here, again, I made some poor choices. I really should have waited for help getting this thing standing, but I didn't. It literally took all of the strength that I have to set this thing up on its wheels, but through sheer willpower I did it alone.


Then I wheeled it into place over my car's engine and hooked up the chainfall.


All in all I'm pretty happy with it. I gave it a quick test and it picked up the whole front end of the car with no problem. I can't wait to pull my engine.

Also, in case you haven't noticed, I took quite a few more photos this post. This is because I have renewed my interest in the high quality camera that is at the shop, as opposed to my iPhone camera. Here are some more fun photos to end the post.


Wednesday, August 10, 2011

8/10/11 Like an Erector Set


Last night, I felt motivated enough to try to finish my gantry.

Because of the torrential downpour causing quite a bit of subway delays, I got a bit of a late start. When I finally did arrive at the shop, I first stole some casters from one of the many dollies we have lying around. I quickly mounted these on the legs of the gantry. Well I say quickly because it is something that seems like it should go quickly, but drilling 9/16" holes in 3/8" plate steel without a drill press is pretty tough. In any case I got it done.

Then I stood back, took a look at what I made and decided that even if the beefier one would be sturdy enough without braces, I wanted them for symmetry.


Twenty minutes later, I was all braced up.


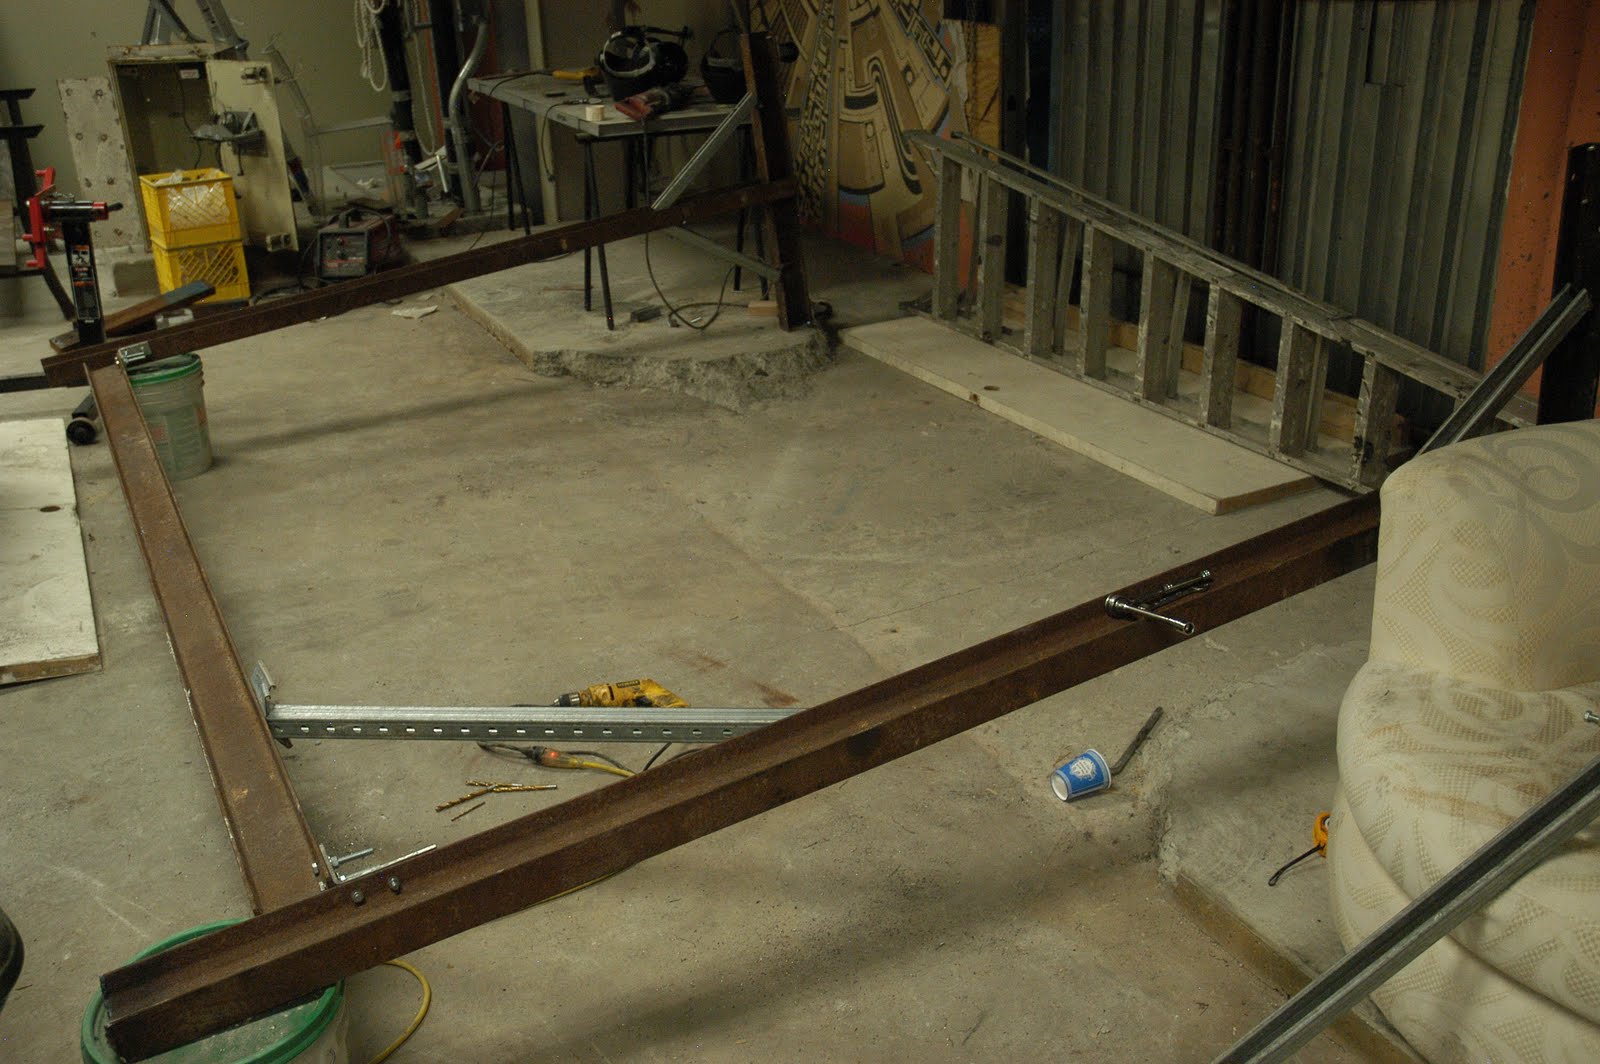
Now here is where things got interesting and a bit stupid. I started drilling holes for the cross beam mounts. This took quite a while, as you might expect, since I was drilling many many many holes in very thick steel. By the time I had everything drilled and was ready to hang the beam, it was fairly late (for me), around 8:30.

Now, I should have known better than to keep working when tired, because it's always in that last half hour that you make stupid decisions. For some reason, which I still don't understand, I decided that I was going to assemble this thing upright. I don't have pictures of what I was doing, so I'm just going to have to describe it. You see that space in front of the corrugated gate, the area where the curb is chopped away? I lined up my two uprights sideways against the section of wall above the curb. Then, I grabbed a ladder and set it up between the uprights. The idea was that I would rest the center of the beam on the ladder while I bolted up the two ends.

What you can't pick up in these photos is exactly how heavy this thing is. Each of those main beams probably weighs about 100 lbs, so I was working with around 300lbs of steel, most of it 9ft off the ground. I manhandled the beam sort of into place, and got one bolt loosely bolted and was moving to the other end when the whole assembly decided it was going down. It turns out 10lb aluminum ladders aren't able to stop 300lbs of steel falling sideways.

It was a slow fall, and I was able to direct the direction of fall so it wasn't a big deal, but it's always interesting to be completely overpowered by something.

After that, I made the right decision and assembled everything sideways, and quit while I was ahead. I will make some braces next time.
When I left, it was a beautiful, damp night in the South Bronx.

-W.W. SBSS

Monday, August 8, 2011

8/8/11 Assemble to Disassemble


The natural process of building a car or motorcycle is this:

First you gather the parts you need to put the bike together. Then you loosely assemble it to make sure everything fits the way you want it to. Then, once you have an idea what it's going to look like, you strip it all down again. Once it's all apart, you clean everything and get it ready for paint. Then, finally, you assemble everything for the last time.

To that end, I roughed in the front end of the bike.


Then I decided I liked where it was going and started pulling it apart again.

It's amazing how small a bike looks when you start removing parts.

Also, you'll notice that the headlight is now tinted yellow. I got a little tint happy and also gave the SV an asymmetrical look.


Before I left for the day, I also built the other half of my gantry for the engine hoist. I am starting to run low on steel, so this side has a slightly different design, but it should be plenty strong enough.
-W.W. SBSS

Wednesday, August 3, 2011

8/2/11Project Cafe Part 2

After picking up the CB700, I spent the next week or so ordering parts online to turn this boxy, 80's bike into the 60's style cafe racer of my dreams.

The first thing on the list is to get rid of the headlight and fairing. To this end I ordered a pretty standard, 7" round headlight.
Which arrived a week or so later from China in some interesting packaging.


In order to mount this on the bike, I ordered some old school looking aluminum headlight mounts.

And the clubman bars I mentioned earlier arrived, so I started pulling the front end of the bike apart.


First, I lowered the forks in the triple trees to bring the front end of the bike down a bit for a more aggressive stance.

Then I slipped the mounts on and temporarily bolted up the headlight and mocked up the handlebars. Much better!

Stay tuned for the first ride, then disassembly for cleaning and painting!

-W.W. SBSS

Thursday, July 21, 2011

Project Cafe: Part 1


I have wanted to build a Cafe Racer for the longest time. For the uninitiated, a Cafe Racer is a type of 60's British sport bike. Back in these days, guys used to strip their bikes down and race from cafe to a predetermined point and back to the cafe, attempting to make this trip before a single song was over on the jukebox. They were always attempting to 'do the ton' or go 'ton up' which meant go over 100mph, quite a feat in the 60's. Cafe racers were the original badass british bikers.
New cafe-style bikes are meant to look like the old Triumphs, BSAs and Nortons, but with relatively modern, more powerful and much more reliable Japanese underpinnings.
To this end, I am building my own Cafe. The ideal bike to start with is a 70's Honda CB750, but these are commanding a little more money than I am willing to spend right now. I did find an 1985 Honda CB700. It is a little different, but much more modern. 
Here is the bike as it stood when I picked it up. It looked good, ran reasonably well so I loaded it up in the truck.
Then I brought it to the shop.
I have already ordered some clubman bars to bring the riding position back down to something a bit more sporty.
Next on the list is getting rid of that very 80's square headlight, and making a sporty single seat.
There is also now a ninja 600 getting some maintenance in the shop, but more on that later....
W.W. SBSS

Friday, July 8, 2011

7/8/11 Why We Build

I originally wanted to keep this blog entirely about the shop, but I came across something too good not to share recently.

Sometimes people ask me why I like to spend so much of my time in the shop working on cars or motorcycles. I think they see it as pure work, rather than seeing the beauty and having the passion for not only the mechanical prowess of a vehicle, but the character and soul of it as well.

Anyone who has spent a half an hour around me has probably been made to listen to heard recordings of various cars revving or racing or having their power tested on a dynomometer. I love these sounds because they really get at the character of a car. Hearing the difference between similarly sized Ferrari and Ford V8's you can just hear the difference in soul and purpose in them.

I think this video touches on some of what I mean....plus it's got some great old jap tin in it.

HBTV: Depth of Speed - JDM Legends Restored from HBTV on Vimeo.

-W.W. SBSS

Wednesday, July 6, 2011

7/6/11 Untangling the Mess


After a great weekend, I went to the shop on Tuesday evening to get some serious work done. I haven't finished the gantry yet, so I can't pull the engine out of the car. That left two major items to be removed: the fuel tank and the dreaded dashboard. Pulling a dashboard can be an incredibly tedious affair, as it has the highest concentration of wires, tubes and cables. This, combined with the fact that most of the bolts that hold the somewhat fragile dashboard into the car are hard to access and even harder to see, makes for a great deal of swearing and busted knuckles.

So I started with the fuel tank. Actually, in my car it is a racing fuel cell. It's a strong, aluminum box with a rubber bladder and blocks of foam to keep the fuel from splashing about. It came out pretty easily, mainly because I was the one who installed it originally.


At this point I was going to start pulling the dash down, but then K.Y. came with a van loaded with tools!

After helping him move in permanently, I relented and started dropping the dashboard.


This is why I hate dashes.

But eventually everything came apart and I had the dash out of the car.

Done working on my car for the day, I took a look at the progress K.Y. was making with the Benz. Slowly but surely the Benz is getting ready to run.

-W.W. SBSS