Thursday, August 25, 2011

8/25/11 Preparing to Camp

I want to go motorcycle camping.

The ideal setup for something like this would be the indestructible BMW R1200GS, shown below with the "Adventure" hard bags.


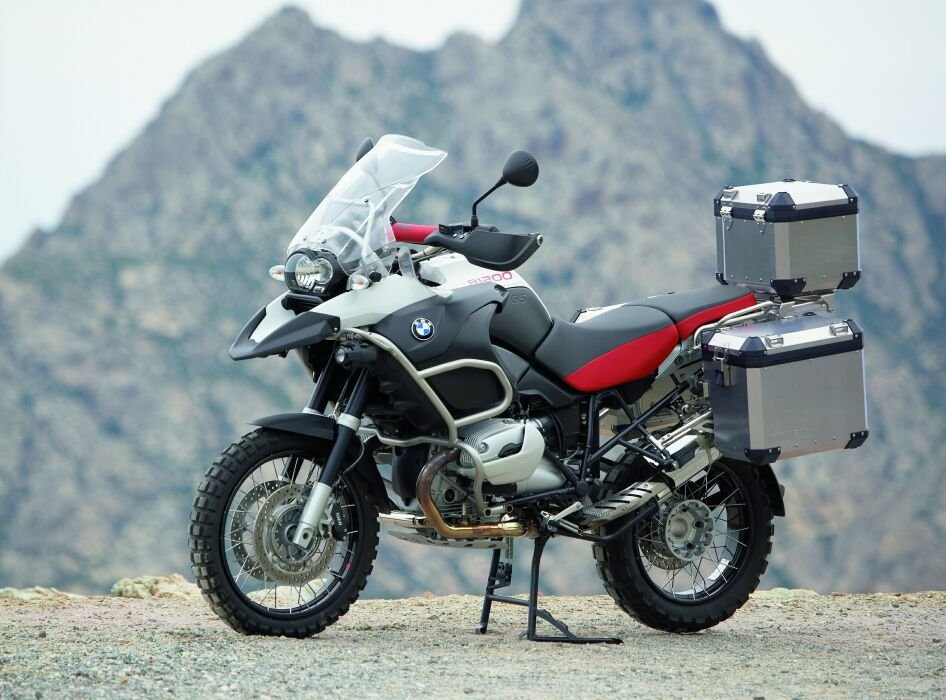
These are awesome bikes. You can ride around the world on one of these and it wont miss a beat. I would love to own one at some point.

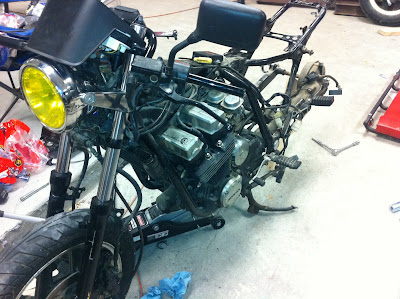
I don't have the money or space for another motorcycle, so I decided to turn my little SV into a sport-tourer. The first thing I did was order a set of strap on saddlebags. These are cheap, lightweight bags with tons of storage and a removable rain cover.


Next, I needed a luggage rack. JB, who has the same bike as me, has a rack for his. It looks pretty beefy, but I couldn't find another one online at a reasonable price. Plus, it's really only meant for one brand of bag.


So I decided to make one myself. I looked around the shop for something to make a rack out of, and my eyes landed on an old shopping cart that we cut the wheels of to add to our rolling door. The sawzall and I made quick work of the cart, and I took what I needed.


To attach it to the bike, I decided to sacrifice my passenger grab bar. The bar really serves no purpose, as no one rides by holding on to something behind them anyway. The only thing I ever used it for was to lock helmets to, but it's strong enough to pick the bike up by, so it should be good for a rack. First I removed it.


Then I removed the hard foam covering the steel.


I bent the section I wanted to use as the rack so that it would sit above the rear seat and mocked it up for welding.


Then I tack welded it and put it on the bike for final adjustment.


Then I mocked up some braces.


And welded them up. They aren't the prettiest welds, but they're strong.


Finally, I painted it black, so it looks a bit less like it came from a shopping cart...


Stay tuned for pictures with all the luggage mounted.

-W.W. SBSS

Wednesday, August 24, 2011

8/24/11 Creative Writing


To my motorcycle passenger

You’re my passenger. 

And on a motorcycle, having a passenger is personal, intimate. My every action is reflected back onto me by your body. Accelerating, I feel the pull on my waist; braking, your weight loads my arms.


Between us there is no need for words, we are hardwired. If you’re nervous, I know it before you realize it, your thighs and hands tightening around me. When excited, your helmeted head tucks in on my left shoulder to better see what’s ahead. Speeding on a cool night, I sense your head behind mine to escape the wind blast. Cruising along or stopped at a light, you scratching my belly or the nape of my neck playfully speaks volumes. I am aware of the smallest shift in your weight, like a lover’s sleeping movements. 

The bike and I speak another tongue. It turns my thoughts and movements into action. I look somewhere and the next moment, riding a wave of sound, I am there. We speak so fluently that my hands and feet melt away into the machine and we become something new and more powerful than the sum of the parts. 

At first, I need to translate for you. I give a little prod of acceleration to remind you to hold on tight before the real power comes. I ease into the brake so I don’t feel your helmet crash into my own.


But soon, we three speak as one. At the slightest turn of my head to a new gap in traffic, your grip tightens in the same instant that the bike turns my desires into reality. As soon as the light flashes yellow, I sense your hand reaching out to rest on the gas tank to take the strain off my arms. Into corners, you’re body follows mine off the seat. It is the most intimate of conversations with no words; with gestures sweet and subtle and loud. 

You’re my passenger, and we’ve a long way to go.

-W.W. SBSS

Wednesday, August 17, 2011

8/17/11 Out with the Old


Over the weekend I tried to pull my engine. In order to remove an engine from a car, there are a number of things that need to be disconnected. One by one I removed the exhaust, fuel lines, coolant lines, vacuum lines, throttle linkage, speedometer cable, shifter, alternator and starter wiring, engine mount, transmission mount.

I disconnected all of these things and, towards the end of the day, started to lift the engine out of the car (can you see where this is going?). At this point, the engine and transmission weigh more than the whole rest of the car. As I was hoisting, I noticed, albeit a bit late, that the car was starting to come up with the engine. Suddenly, the rear of the car fell off the jackstands. This sounds quite a bit worse than it actually was, as I was able to pick up the rear of the car by myself and stand it back up, but it was startling nonetheless. I wrestled with the engine a bit trying to figure out why it was stuck, thinking that the transmission was catching on the transmission tunnel.


It turns out I forgot to disconnect one thing: the clutch line. Of course I didn't figure this out until I went back with a fresh mind on Monday.

Once I clipped the clutch line, the engine came out pretty easily.


Today I installed a HID (High Intensity Discharge) headlight kit on my SV. I thought my lights weren't as bright as I would like for night riding and bought this kit to fix it.

This is what the beam looked like before.

I then installed the new HID bulbs into my round housings. This also presented a great chance to use my milling machine to open up the small round hole in the back of the housing into a square(ish) hole so the new plugs could fit through!


After!

Also, new motorcycle jacket.

-W.W. SBSS

Thursday, August 11, 2011

8/11/11 Gantrification of the South Bronx


It's done!

After far too many weeks, my gantry is done!

It took drilling, drilling, and more drilling to get it built. Actually, the most difficult part was keeping my drill bits sharp. As it turns out, drill bits aren't too fond of drilling through steel over and over, and tend to overheat and lose their edge.

In order to give it a bit of stiffness I put in two braces.


Once I had both in, I stood it upright. Here, again, I made some poor choices. I really should have waited for help getting this thing standing, but I didn't. It literally took all of the strength that I have to set this thing up on its wheels, but through sheer willpower I did it alone.


Then I wheeled it into place over my car's engine and hooked up the chainfall.


All in all I'm pretty happy with it. I gave it a quick test and it picked up the whole front end of the car with no problem. I can't wait to pull my engine.

Also, in case you haven't noticed, I took quite a few more photos this post. This is because I have renewed my interest in the high quality camera that is at the shop, as opposed to my iPhone camera. Here are some more fun photos to end the post.


Wednesday, August 10, 2011

8/10/11 Like an Erector Set


Last night, I felt motivated enough to try to finish my gantry.

Because of the torrential downpour causing quite a bit of subway delays, I got a bit of a late start. When I finally did arrive at the shop, I first stole some casters from one of the many dollies we have lying around. I quickly mounted these on the legs of the gantry. Well I say quickly because it is something that seems like it should go quickly, but drilling 9/16" holes in 3/8" plate steel without a drill press is pretty tough. In any case I got it done.

Then I stood back, took a look at what I made and decided that even if the beefier one would be sturdy enough without braces, I wanted them for symmetry.


Twenty minutes later, I was all braced up.


Now here is where things got interesting and a bit stupid. I started drilling holes for the cross beam mounts. This took quite a while, as you might expect, since I was drilling many many many holes in very thick steel. By the time I had everything drilled and was ready to hang the beam, it was fairly late (for me), around 8:30.

Now, I should have known better than to keep working when tired, because it's always in that last half hour that you make stupid decisions. For some reason, which I still don't understand, I decided that I was going to assemble this thing upright. I don't have pictures of what I was doing, so I'm just going to have to describe it. You see that space in front of the corrugated gate, the area where the curb is chopped away? I lined up my two uprights sideways against the section of wall above the curb. Then, I grabbed a ladder and set it up between the uprights. The idea was that I would rest the center of the beam on the ladder while I bolted up the two ends.

What you can't pick up in these photos is exactly how heavy this thing is. Each of those main beams probably weighs about 100 lbs, so I was working with around 300lbs of steel, most of it 9ft off the ground. I manhandled the beam sort of into place, and got one bolt loosely bolted and was moving to the other end when the whole assembly decided it was going down. It turns out 10lb aluminum ladders aren't able to stop 300lbs of steel falling sideways.

It was a slow fall, and I was able to direct the direction of fall so it wasn't a big deal, but it's always interesting to be completely overpowered by something.

After that, I made the right decision and assembled everything sideways, and quit while I was ahead. I will make some braces next time.
When I left, it was a beautiful, damp night in the South Bronx.

-W.W. SBSS

Monday, August 8, 2011

8/8/11 Assemble to Disassemble


The natural process of building a car or motorcycle is this:

First you gather the parts you need to put the bike together. Then you loosely assemble it to make sure everything fits the way you want it to. Then, once you have an idea what it's going to look like, you strip it all down again. Once it's all apart, you clean everything and get it ready for paint. Then, finally, you assemble everything for the last time.

To that end, I roughed in the front end of the bike.


Then I decided I liked where it was going and started pulling it apart again.

It's amazing how small a bike looks when you start removing parts.

Also, you'll notice that the headlight is now tinted yellow. I got a little tint happy and also gave the SV an asymmetrical look.


Before I left for the day, I also built the other half of my gantry for the engine hoist. I am starting to run low on steel, so this side has a slightly different design, but it should be plenty strong enough.
-W.W. SBSS