Thursday, March 15, 2012

3/15/12 Exhausting

With the Y-Pipe on, it's *a little* quieter so I ventured a little farther from the nest. I also Installed the driver side seatbelt for some safety. The car felt good. It really does seem to handle tightly. I did a couple hard brake tests and it seems that I don't need a bigger brake booster, as locking the wheels was no problem. That said, I do need to bleed them a bit better, as my left front locked far before my right front and I need to adjust my proportioning valve as well. but these are details.

I drove the car to bruckner and grabbed dinner. Also noting my electric fan and thermostat worked exactly as it should. Man it looks small...

Tomorrow I'm going to CB's shop to borrow his lift to install my exhaust. In preparation for this, I *ahem* modified the exhaust I stole from one of his parts cars. Here the tried and true Mike Fiesta method of making a generic muffler sound good. Mike and I did this to the muffler on my old car way way way back in the day, and the thing had the perfect amount of rasp. 

Step one, cut a flap in the muffler housing.

Step two, expose the innards.

Step three, remove innards.


Step four, weld shut.

That's it. hehe

Stay tuned for the results. 

-W.W. SBSS

Wednesday, March 14, 2012

3/14/12 I Drove It!

I actually drove it on Monday, but forgot to update. It was a short drive to the gas station and back, and I really couldn't stretch it's legs because it's deafeningly loud with the open headers (I set off a few car alarms just putting around), but it felt good and moved turned and stopped like it should.

Here's proof.

I've been also taking care of little stuff around the car making it roadworthy:

Adjusted the clutch
Adjusted the throttle linkage
Installed the new ignition module
Shimmed the front struts
Installed the Fox body mustang rear hatch seal, was a pain to get on but seems good now
Installed the passenger carpet hold down and both sill plates
Installed my exhaust Y-pipe in preparation for putting a real exhaust on it.

Still to do:
Finish exhaust
Gas cap
Order/install heater hoses
Attach heater panel
Install seatbelts
Seal tiny leaks in radiator
Many many other little things.

That said, the car should be a reasonable runner in a couple days...which is good because they are cutting power to the shop this week. I'll be relocating my stuff back to Newark this weekend.

-W.W. SBSS

Monday, March 12, 2012

3/12/12 IT LIVES!

This weekend I got some good work done on the car. First, I installed my proportioning valve. I heard some horror stories about flaring the brake lines from some pretty experienced people online but I had absolutely no trouble with it at all. Here's the process.

There are two reasons that i needed to flare the brake lines.
1. I needed to add a component
2. The fittings for that component were SAE rather than metric which the rest of the car is.

This meant I needed one line to go from the metric brake level switch to the SAE proportioning valve and to cut the existing rear brake line and put an SAE fitting on there to go to the other side of the prop valve.

I did a practice flare which came out perfect, so I did the swithc to prop line first, mainly because I could do it off the car at a bench.

Here are the tools in the flare kit.

First you cut the line.

Then you debur the inside and chamfer the outside.


Then you do the first flare which makes it bell shaped, then you do the second which folds it back in on itself, making the proper 45 degree flare.

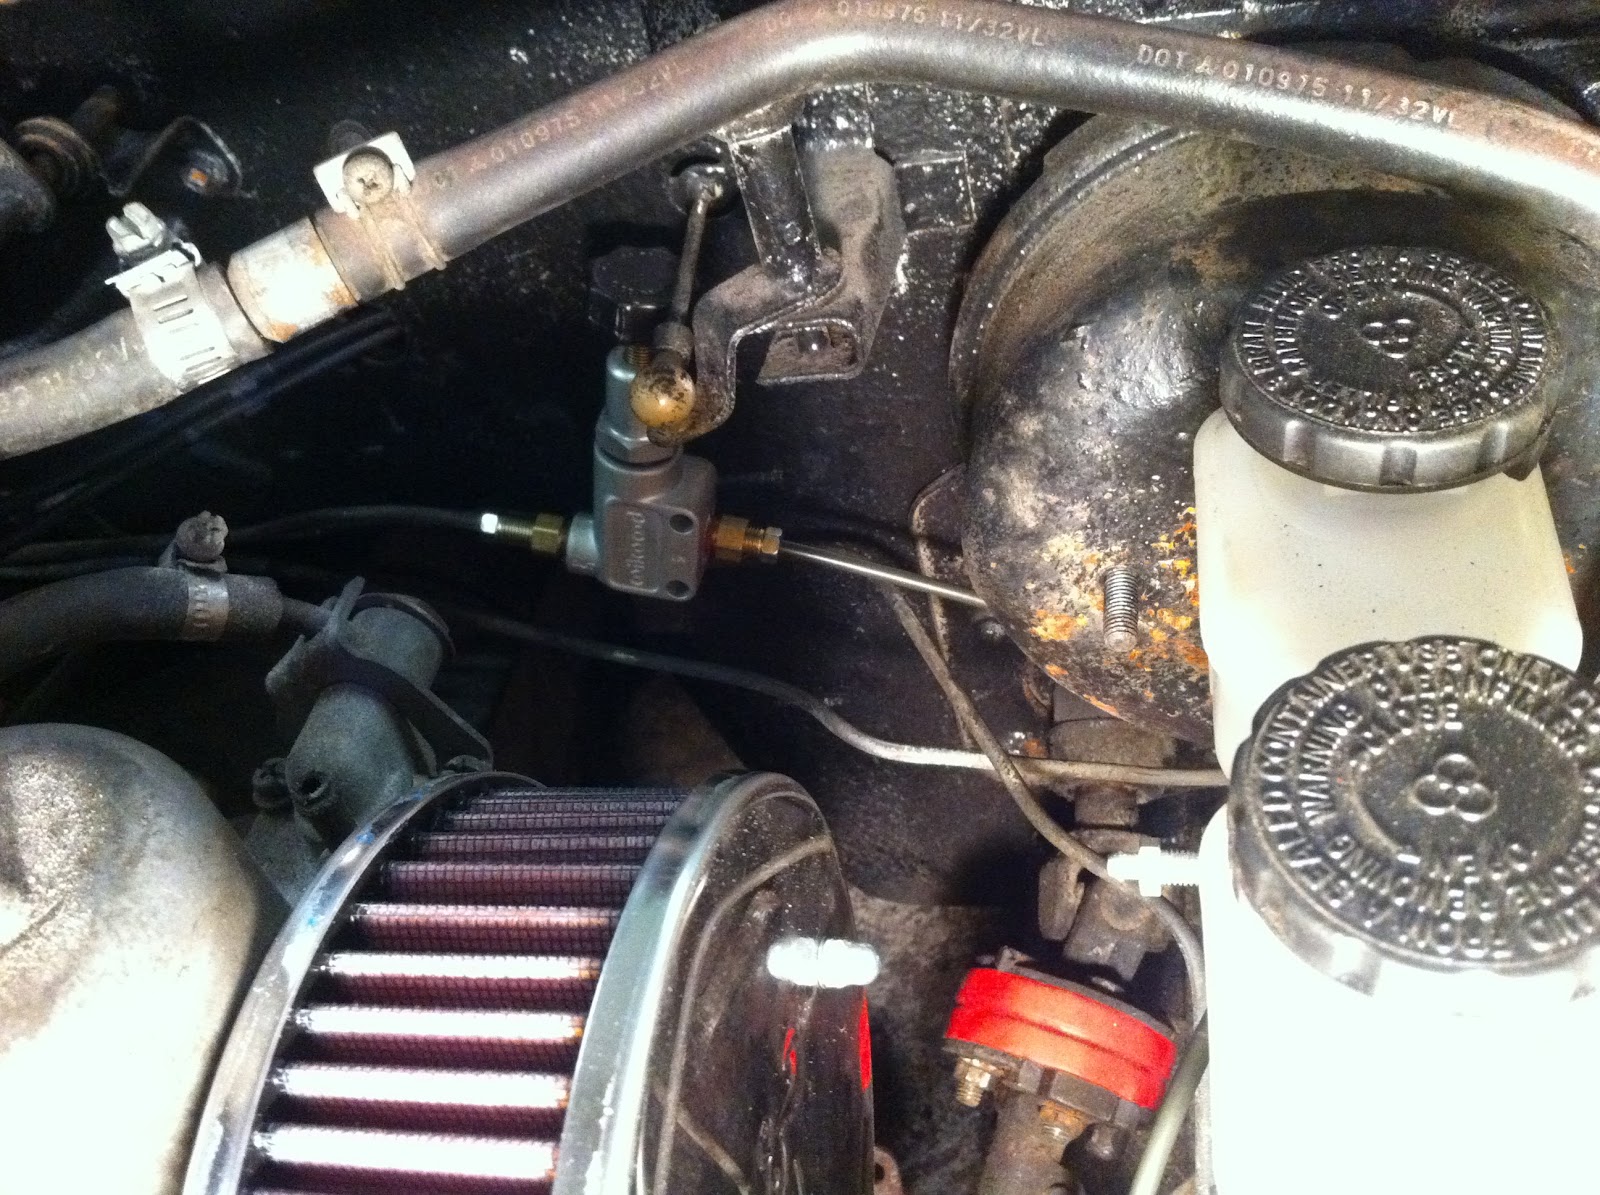
One more flare and the valve was on the car. I later bolted it to the firewall all neat and clean.


Then I mounted and wired my new SPAL cooling fan.

On Saturday JB was picking me up in his new A7 to go to dinner. While he was pulled over waiting for me to come outside, some fool hit the gas instead of the brake when leaving a parking spot in front of him and backed into the 3 week old car. This is why we can't have nice things.


I found myself a little bored, so I tried something out. One of the pins on my ignition module was broken. I have a new one on the way, but in the mean time I was curious whether I could fix it anyway. I took the soldering iron and dug out the pin from the plastic casing. I then soldered a wire to it and reinstalled it. To my shock it ran right away.

Here are some gratuitous videos. Also one of CB driving away in his 260.


I didn't drive it but I put it on the ground and moved it back and forth and stopped it with the brakes. It's a car!

-W.W. SBSS

Thursday, March 8, 2012

3/8/12 Little Victories

The other day I had a couple of little victories with my car. As I've mentioned, the 5speed transmission I had in my old car has the shifter exit about 2 inches further forward than the factory shifter on an early 240z. I trimmed the sheet metal a little to get that to clear, but it soon became obvious that it was going to hit the factory center console. This is the shifter not quite all the way into 3rd gear.


I picked up a 72 center console from CB, only to learn that all of the mounting points are different so I really couldn't use it without doing a ton of work. To fix this, I took a suggestion from DC and bent my shifter to clear.

My first iteration wasn't quite bent enough to clear the console entirely.


More heat and more bending and I had this.


Now the shifter clears perfectly, the car is in 3rd gear in this shot.


I also got a new clutch flex line, swapped the hardlines and master cylinder out from my old car (the one in 1905 was looking a little corroded) and buttoned everything up. I now have a functional clutch.

Sometimes it's the little things.

-W.W. SBSS

Monday, March 5, 2012

3/5/12 Two Steps Forward...

This weekend I took Friday off to take care of some errands. The most important of these was going to the DMV and finally putting 1905 in my name. I was a little worried because NYS doesn't issue titles for cars so old so I was only bringing a transferable registration to the NJ DMV, but everything worked out well and I left with a new title in my name and plates for the car.

I also brought my spare hatch from NJ to the shop and from there to and auto glass shop in the Bronx. I have to say I was impressed by how quickly and easily they removed and installed the glass. They even saved my old hatch rubber since it was in good shape. I watched them work and learned the tricks so it was money well spent. 

I installed my new fuse block and everything came to life. The lights and wiper all work perfectly (except the front turn signals which I haven't hooked up yet. This is likely this first time electricity has passed through these wires in 35 years.


I also installed the gas tank and ran *almost* all the rubber lines. I would have gotten it started, except there was a minor mishap in the distributor wiring and I need a new one... The issue was created by the craz wiring that the previous owner of my old car did. The hacked up harness made it hard to figure out what was done, and so power was connected to the distributor incorrectly, frying the electronic unit. A new one is being sourced now and I should be running shortly. 


Major items left:
  • Clutch flex hose - on the way
  • Brake proportioning valve needs to be plumbed into the hard lines.
  • Brake lines need to be connected
  • I need to figure out a solution for my center console. I have the original one from the car, but because it is an early car, the transmission comes out too far forward and the shifter interferes with the console. Also because it is an early car, later consoles don't have the same mounting points. I think I'm going to end up either bending my shifter or trimming the console or both.
  • Need the push pins for the interior plastics
  • Need to figure out why my blower motor isn't turning on
  • Install the heater control cables 
  • Plumb heater into car
  • Get hatch weatherstrip
  • Get nuts and bolts for right headlight bucket (some of the originals broke because they were rusty when I dissassembled the car.)
  • Make shim for front top nut.

On an unrelated note, I saw a Bentley Mulsanne  on the road the other day. Pictures don't do justice to how large this car is. It is SUBSTANTIALLY bigger than the continentals you see around NYC all the time. It's about the same length as the extra long wheelbase version of the Escalade 


 Look how high the door sills are from the vantage of the admittedly small Miata. It was like being next to a Range Rover.


-W.W. SBSS