

As soon as I told G.B. about this shop, his eyes lit up. He stopped by the next day and when he met the rest of the guys that weekend it was clear that he would be spending a lot of time with us in the shop.
Literally, within one week I was with G.B. in a UHaul truck driving to queens to pick up a $200 1988 Yamaha FZR1000. Yes, $200 is very cheap, even for a non-rideable bike. It turns out that the previous owner parked it on the street only to have a car knock it over. This bent the right clip-on and locked the throttle. The battery was also nearly dead and it had a flat rear tire. We scavenged a plank of wood from a nearby restaurant and rolled the bike into the uhaul. We arrived at the shop to find A.Y. and J.B. working on the door. Here is G.B. on the bike as it stood that night.

The next week, I started trying to get the bike road worthy. First, I pulled the right clip on and removed the brake and throttle to find this.

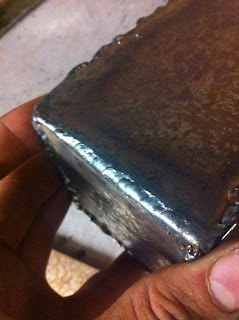
After some massaging with the torch and some blunt force I got it to look like this.

I put it back on the bike and voila! The throttle worked!
Next I charged up the battery and cranked it fully expecting nothing to happen…but NO! It started fairly easily. I let it warm up a bit and took it for a slow spin around the garage. It definitely has some carburetion issues and doesn’t like to run with the choke off, but it does run.
Next task is to pull the carbs, clean them up and see if we can get this to run smoothly. Here she is as she sits now.


The SV650S has a half fairing and lower clip on bars as can be seen on my bike.

I bought an S model because I wanted the lower bars and that change is harder to make later, but I really loved the look of the naked bikes. To this end I started gathering the parts necessary to strip my bike.
The first thing I needed was headlights. I’m not sure how long I’m going to keep this bike, so I didn’t want to invest too much in the headlights, so I settled on the hella optilux 4” round driving lights. They are more than bright enough and look great in my opinion.

The next thing I needed to round up was a mount for the lights to attach to the front fork. I initially bought these…because they were cheap. Once I got them I realized that there was a reason they were cheap and quickly discarded them.

I then got these mounts which are much more substantial.

The last thing I had to sort out was my gauges. The stock gauges are mounted to the fairing, so I had to remove them to convert my bike. I decided that rather than remounting the stock ones, I would go with the Trailtech Vapor. It’s a cheap digital dashboard that gives me my idiot lights, a tach, speedo, and temp gauge. I mounted it to my lights, wired it up and it works great.

What took me the longest was tucking the unnecessarily long wiring harness from the SVS into the area under the tank. This harness usually hangs out behind the fairing, and takes up quite a bit of space in the bike, but I finally got it all hidden away.

While I was at it I installed some frame sliders to protect the bike from a drop or fall. Next on the list are bar end mirrors and making a mini fairing for the lights.

-W.W. SBSS